
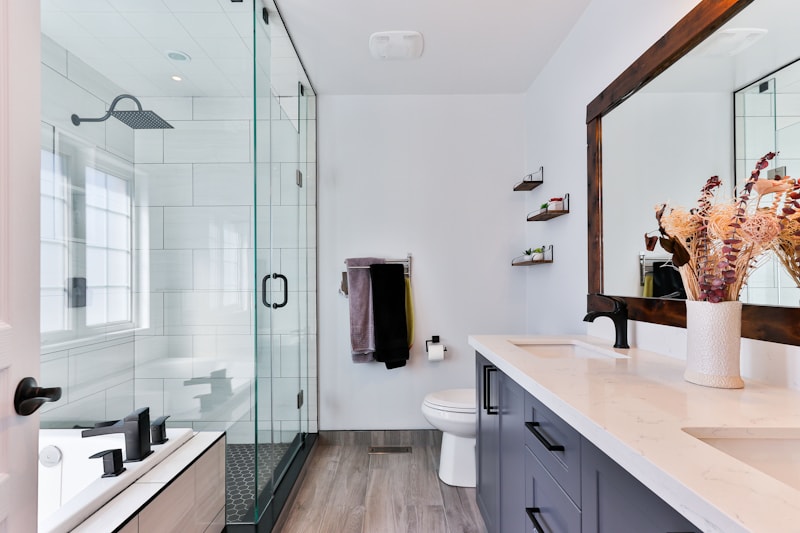
Planning a bathroom renovation in Chandler, AZ? One of the first questions homeowners ask is “How long does a bathroom remodel take?”
The answer depends on the size of the bathroom, the amount of demolition, whether plumbing or electrical systems are being changed, the materials selected, and whether permits or inspections are required.
A straightforward bathroom update may take less time than a complete renovation involving a custom shower, new tile, plumbing changes, cabinetry, and other upgrades. Larger master bathroom projects can take longer because they typically involve more materials, trades, and installation steps.
This guide explains the typical bathroom remodeling timeline in Chandler, AZ, so you know what to expect from the initial consultation through the final walkthrough.
How Long Does a Bathroom Remodel Take in Chandler, AZ?
A typical bathroom remodel can take several weeks from planning through completion, although the actual construction period varies from project to project.
A smaller bathroom update may involve fewer trades and simpler installation. A complete bathroom renovation can require demolition, plumbing and electrical work, waterproofing, tile installation, cabinetry, countertops, fixtures, painting, and inspections.
The biggest factors affecting your timeline include:
- Bathroom size and layout
- Amount of demolition required
- Plumbing relocation
- Electrical modifications
- Shower or tub replacement
- Custom tile work
- Waterproofing requirements
- Vanity and countertop availability
- Custom glass enclosure fabrication
- Material lead times
- Permit and inspection requirements
- HOA requirements, when applicable
- Unexpected conditions discovered after demolition
For this reason, a professional remodeling company should provide a project schedule based on the actual scope of your Chandler bathroom renovation rather than promising that every project will take the same number of days.
Bathroom Remodeling Timeline: Step-by-Step
Although every renovation is different, most complete bathroom remodeling projects follow a similar sequence.
1. Initial Consultation and Bathroom Evaluation
The process starts with a conversation about your goals, budget, preferred design, and expected timeline.
During the evaluation, the remodeling team can review:
- Existing bathroom layout
- Shower or bathtub condition
- Vanity and storage needs
- Flooring and wall finishes
- Plumbing locations
- Electrical requirements
- Lighting
- Ventilation
- Accessibility requirements
- Potential layout improvements
This stage is also the right time to determine whether you want a cosmetic update or a more extensive bathroom renovation.
For example, replacing a vanity and fixtures is very different from removing a bathtub, installing a custom walk-in shower, relocating plumbing, and replacing the flooring.
2. Bathroom Design and Material Selection
Once the scope is established, the next step is selecting the materials and finishes.
Depending on your project, this may include:
- Porcelain or ceramic tile
- Shower wall tile
- Bathroom floor tile
- Vanity cabinets
- Quartz countertops
- Faucets
- Shower fixtures
- Toilets
- Mirrors
- Lighting
- Shower glass
- Shower niches
- Shower benches
- Hardware and accessories
Making major selections before construction begins can help prevent unnecessary delays.
For Chandler homeowners, material selection can also be an opportunity to choose surfaces that are easier to maintain in a hard-water environment.
Dense porcelain tile, appropriate grout systems, and easy-to-clean shower glass can all contribute to a lower-maintenance bathroom.
3. Permits and Project Preparation
Some bathroom remodeling projects require permits depending on the work being performed.
Projects involving plumbing, electrical, structural changes, or other regulated construction may require review and inspection by the appropriate local authorities.
Before demolition begins, the project should be properly planned and any required approvals should be addressed.
This stage can also include:
- Finalizing the project scope
- Confirming material availability
- Coordinating trades
- Preparing the work area
- Establishing site protection
- Confirming the construction schedule
If your project is located within an HOA community, additional requirements may also apply.
Learn more about local requirements in our guide to bathroom remodeling permits in Chandler.
4. Demolition and Removal
Once construction begins, demolition is usually one of the first physical stages.
Depending on the project, this can involve removing:
- Existing bathtub or shower
- Shower enclosure
- Vanity
- Countertop
- Bathroom flooring
- Wall tile
- Old fixtures
- Damaged materials
The bathroom is then prepared for the next phase of construction.
Demolition can also reveal conditions that were not visible before the walls or flooring were opened.
For example, the remodeling team may discover:
- Water damage
- Deteriorated substrate
- Outdated plumbing
- Framing issues
- Previous installation problems
If unexpected conditions are found, the scope and schedule may need to be adjusted.
5. Plumbing and Electrical Work
If the bathroom layout is changing, plumbing and electrical work generally happens after demolition and before the walls and finished surfaces are closed.
Plumbing work may include:
- Relocating a shower valve
- Changing shower fixtures
- Modifying drain locations
- Replacing plumbing components
- Preparing connections for a new vanity
- Preparing connections for a new toilet
Electrical work may include:
- New lighting
- Vanity lighting
- GFCI outlets
- Exhaust fan improvements
- Switch relocation
- Additional electrical connections
Keeping the original plumbing layout can sometimes simplify the project, while major layout changes can add work and time.
6. Shower Waterproofing
For a custom shower, waterproofing is one of the most important stages of the installation.
Before tile is installed, the shower assembly must be properly prepared to manage water and moisture.
Depending on the system selected, the work may include:
- Preparing the shower substrate
- Installing the shower pan or shower base
- Creating appropriate drainage
- Waterproofing shower walls
- Waterproofing corners and transitions
- Sealing penetrations
- Preparing niches and benches
At ARZ Home Remodeling, our shower remodeling work uses the Schluter-KERDI waterproofing system where specified for the project.
You can learn more about the differences between waterproofing approaches in our guide to Schluter-KERDI vs. RedGard in Arizona.
Proper waterproofing is especially important because finished tile does not replace the waterproofing layer behind the shower surface.
7. Tile Installation
After the shower and substrate are properly prepared, tile installation can begin.
This may include:
- Shower wall tile
- Shower floor tile
- Bathroom floor tile
- Decorative accent tile
- Shower niche tile
- Backsplash tile
- Base or trim details
Tile installation requires careful layout and preparation. Large-format tile, intricate patterns, niches, benches, and multiple tile transitions can require additional installation time.
Once the tile has been installed and properly set, grout and finishing work follow.
For more information, see our bathroom tile installation service.
8. Vanity, Countertop and Cabinet Installation
The next stage can include installation of the bathroom vanity, countertop, sink, and related hardware.
Depending on the project, this may involve:
- Vanity cabinets
- Quartz countertop
- Undermount or vessel sink
- Faucets
- Cabinet hardware
- Mirrors
- Storage accessories
Custom or made-to-order components may require additional coordination, which is why material availability should be confirmed before construction starts.
9. Shower Glass and Bathroom Fixtures
Once the surrounding surfaces are ready, the final bathroom components can be installed.
These may include:
- Frameless shower glass
- Shower doors
- Faucets
- Showerheads
- Handheld shower fixtures
- Toilet
- Towel bars
- Mirrors
- Lighting fixtures
- Bathroom accessories
For custom frameless glass, measurements and fabrication can affect the schedule, so glass installation should be coordinated with the overall project timeline.
If you're considering frameless glass, read our guide Is Frameless Shower Glass Worth It for Chandler Homeowners?.
10. Painting, Trim and Final Details
The final construction stage focuses on completing the details that bring the bathroom together.
This can include:
- Interior painting
- Trim installation
- Caulking
- Hardware installation
- Fixture adjustments
- Mirror installation
- Final electrical work
- Final plumbing connections
- Cleaning
The goal is to make sure the completed bathroom is functional, clean, and ready for the final inspection and homeowner walkthrough.
11. Final Inspection and Walkthrough
When permits are part of the project, required inspections must be completed according to the applicable construction requirements.
After construction is complete, the remodeling team should perform a final walkthrough with the homeowner.
This is an opportunity to review:
- Tile installation
- Grout lines
- Shower operation
- Faucets
- Drainage
- Vanity and cabinets
- Lighting
- Fixtures
- Glass enclosure
- Paint and trim
- Overall workmanship
Any remaining punch-list items can then be addressed.
What Can Delay a Bathroom Remodel in Chandler?
Even a well-planned renovation can encounter delays.
Common causes include:
Material Availability
Special-order tile, vanities, countertops, fixtures, and shower glass can have different lead times.
Unexpected Damage
Removing old tile, tubs, or flooring can reveal hidden water damage or deteriorated materials.
Plumbing Changes
Moving drains, shower valves, toilets, or other plumbing connections can increase the amount of work required.
Electrical Changes
Additional lighting, outlets, switches, or other electrical modifications can affect the construction schedule.
Permit or Inspection Requirements
Projects requiring permits may need to accommodate plan review and inspection scheduling.
Design Changes
Changing tile, fixtures, layouts, or finishes after construction has started can interrupt the planned sequence.
Custom Features
Curbless showers, large-format tile, built-in benches, niches, custom glass, and other detailed features can require additional installation time.
How to Keep Your Bathroom Remodel on Schedule
If you want your Chandler bathroom renovation to move as smoothly as possible, preparation matters.
Finalize Your Design Early
Choose your major materials and fixtures before construction begins whenever possible.
Confirm Material Availability
Make sure important materials are available or properly ordered before demolition starts.
Avoid Unnecessary Layout Changes
Keeping plumbing and electrical locations in their existing positions can sometimes reduce construction complexity.
Plan Custom Glass in Advance
Custom shower glass requires accurate measurements and fabrication. It should be coordinated with the installation schedule.
Discuss Permits Before Construction
Determine whether your project requires permits and inspections before work begins.
Allow for Unexpected Conditions
Older bathrooms can contain hidden problems that are impossible to identify until demolition begins.
How Long Does a Shower Remodel Take?
A shower-only renovation can have a different timeline from a complete bathroom renovation.
A basic shower update may involve fewer construction stages, while a custom walk-in shower can require:
- Demolition
- Plumbing preparation
- Shower base preparation
- Waterproofing
- Tile installation
- Grouting
- Glass measurement and installation
- Fixture installation
- Final inspection and cleanup
The exact schedule depends on the shower design, materials, plumbing requirements, and site conditions.
If you're considering replacing a bathtub with a walk-in shower, see our guide to tub-to-shower conversion ideas in Chandler.
How Long Does a Master Bathroom Remodel Take?
A master bathroom renovation can take longer than a smaller guest bathroom because it often includes more features and a larger scope.
A master bathroom project may include:
- Custom walk-in shower
- Freestanding bathtub
- Double vanity
- New countertops
- Large-format tile
- Custom shower glass
- Additional lighting
- New flooring
- Plumbing modifications
- Accessibility improvements
- Layout changes
The more extensive the renovation, the more important detailed planning becomes.
Chandler Bathroom Remodeling Timeline: Quick Overview
| Project Stage | What Happens |
|---|---|
| Consultation | Discuss goals, budget, layout and project scope |
| Design & Selections | Choose tile, vanity, fixtures, glass and finishes |
| Planning & Permits | Address applicable permits, inspections and scheduling |
| Demolition | Remove existing bathroom materials and fixtures |
| Rough-In Work | Complete required plumbing and electrical modifications |
| Waterproofing | Prepare and waterproof shower areas |
| Tile Installation | Install shower, wall and floor tile |
| Cabinetry & Countertops | Install vanity, countertop and sinks |
| Fixtures & Glass | Install plumbing fixtures, lighting and shower enclosure |
| Finishing | Complete paint, trim, hardware and final details |
| Final Walkthrough | Review completed work and address remaining items |
Start Your Chandler Bathroom Remodeling Project
A successful bathroom renovation starts with a realistic schedule and a clearly defined scope of work.
Whether you're planning a guest bathroom update, tub-to-shower conversion, walk-in shower, or complete master bathroom remodel, ARZ Home Remodeling can help you plan the project from the initial consultation through the final walkthrough.
We serve homeowners in Chandler, AZ, with remodeling services focused on functional layouts, durable materials, custom showers, tile installation, and complete bathroom transformations.
Ready to discuss your project?
Call ARZ Home Remodeling at (520) 569-3339 to schedule your free estimate.